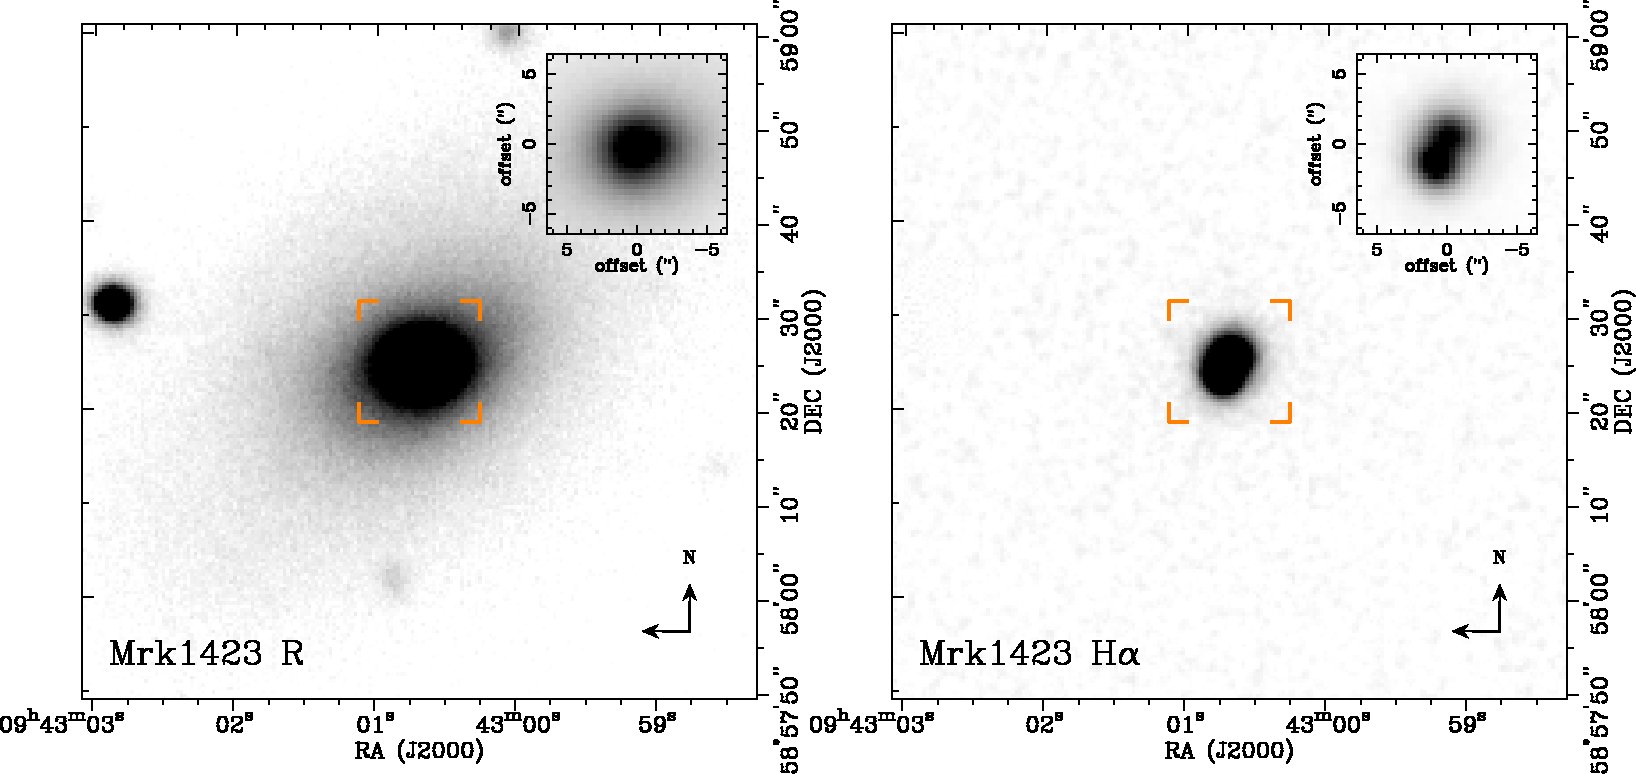
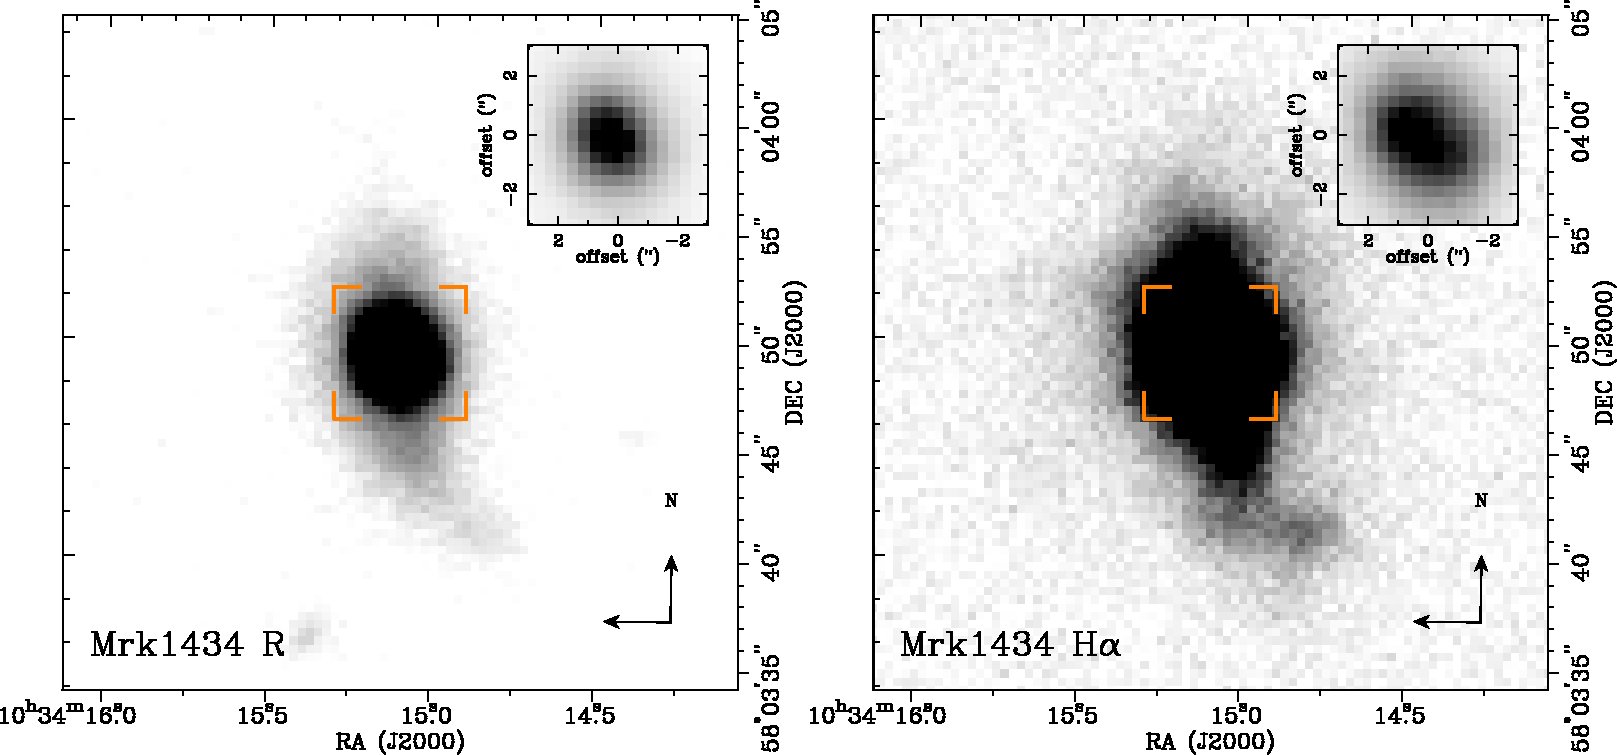
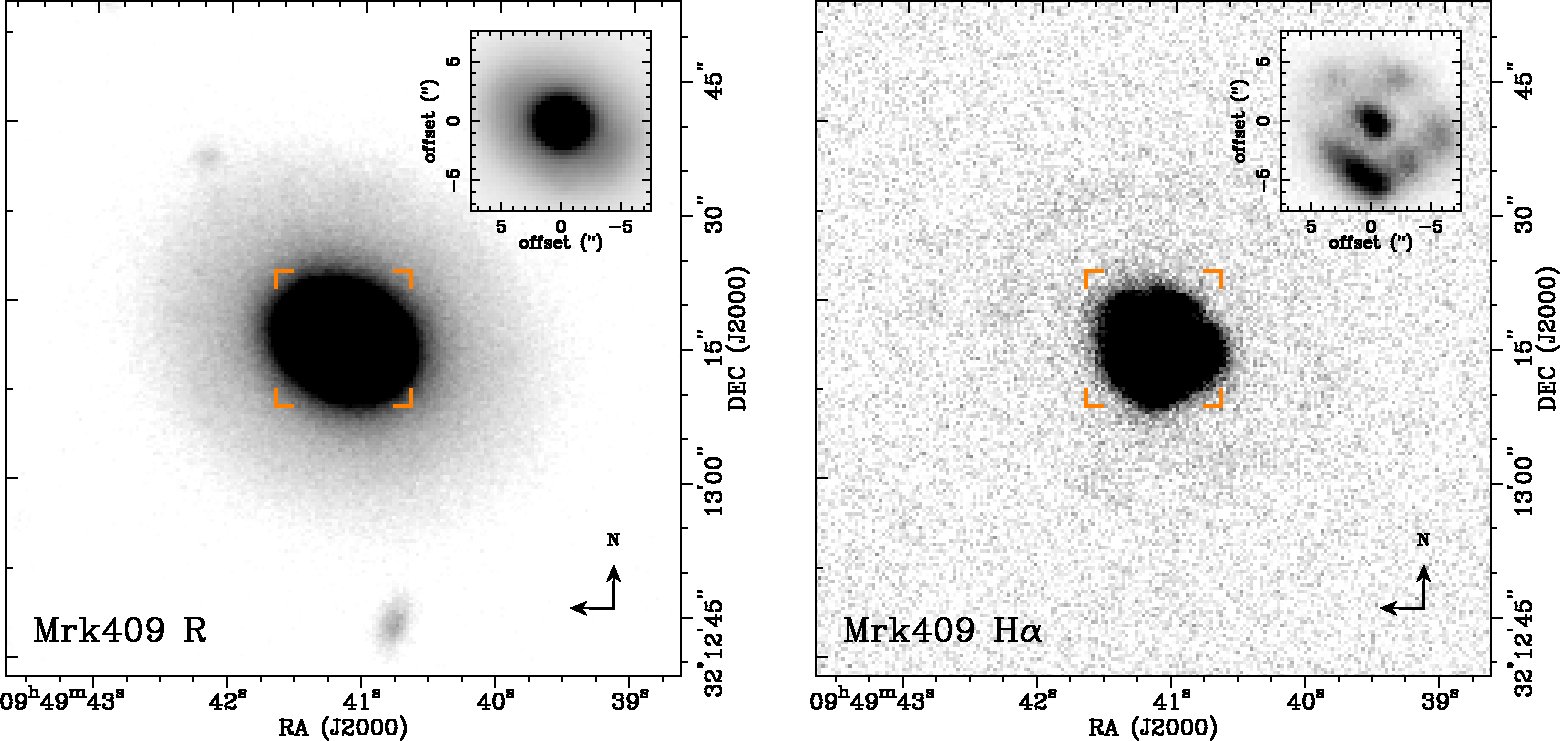
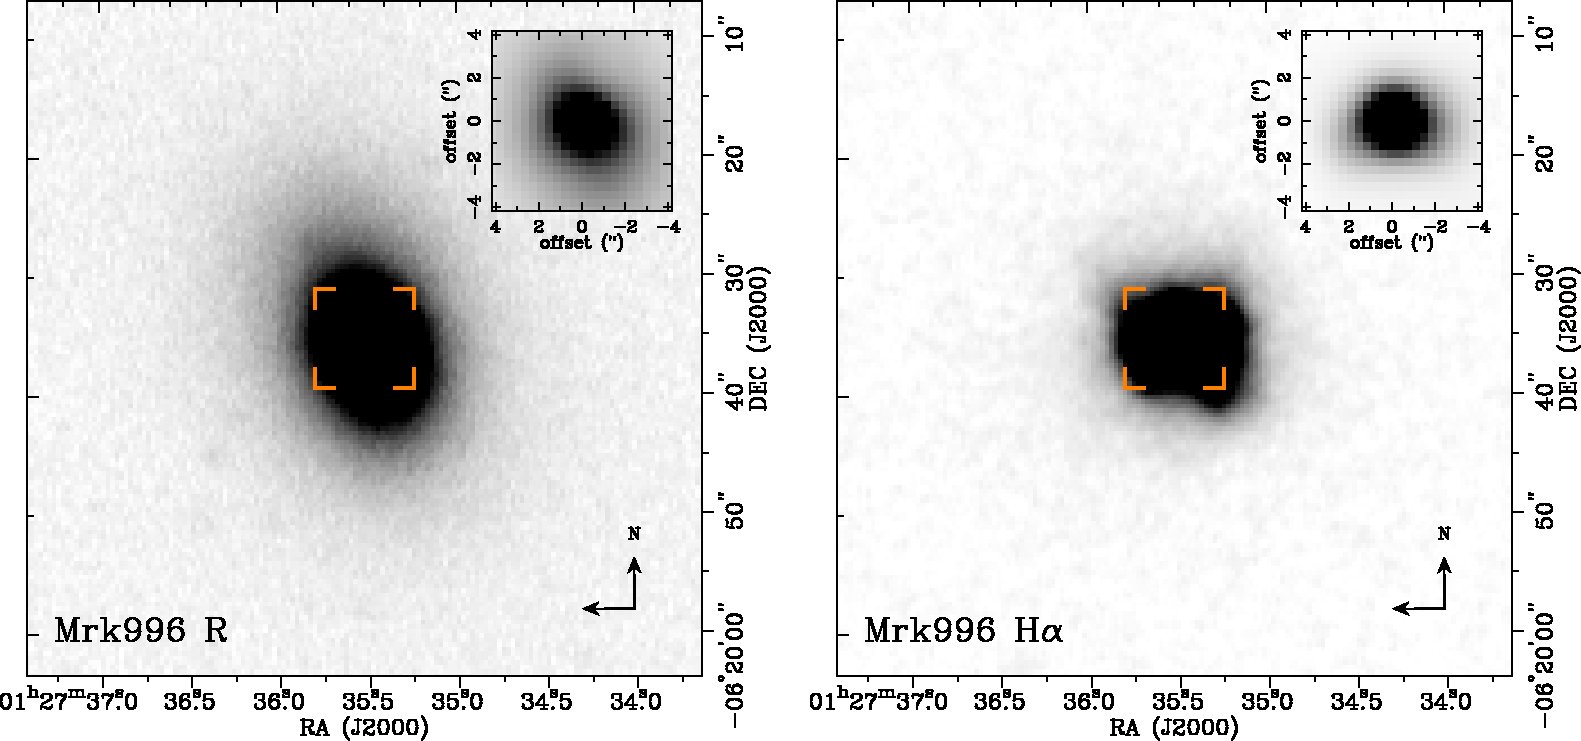
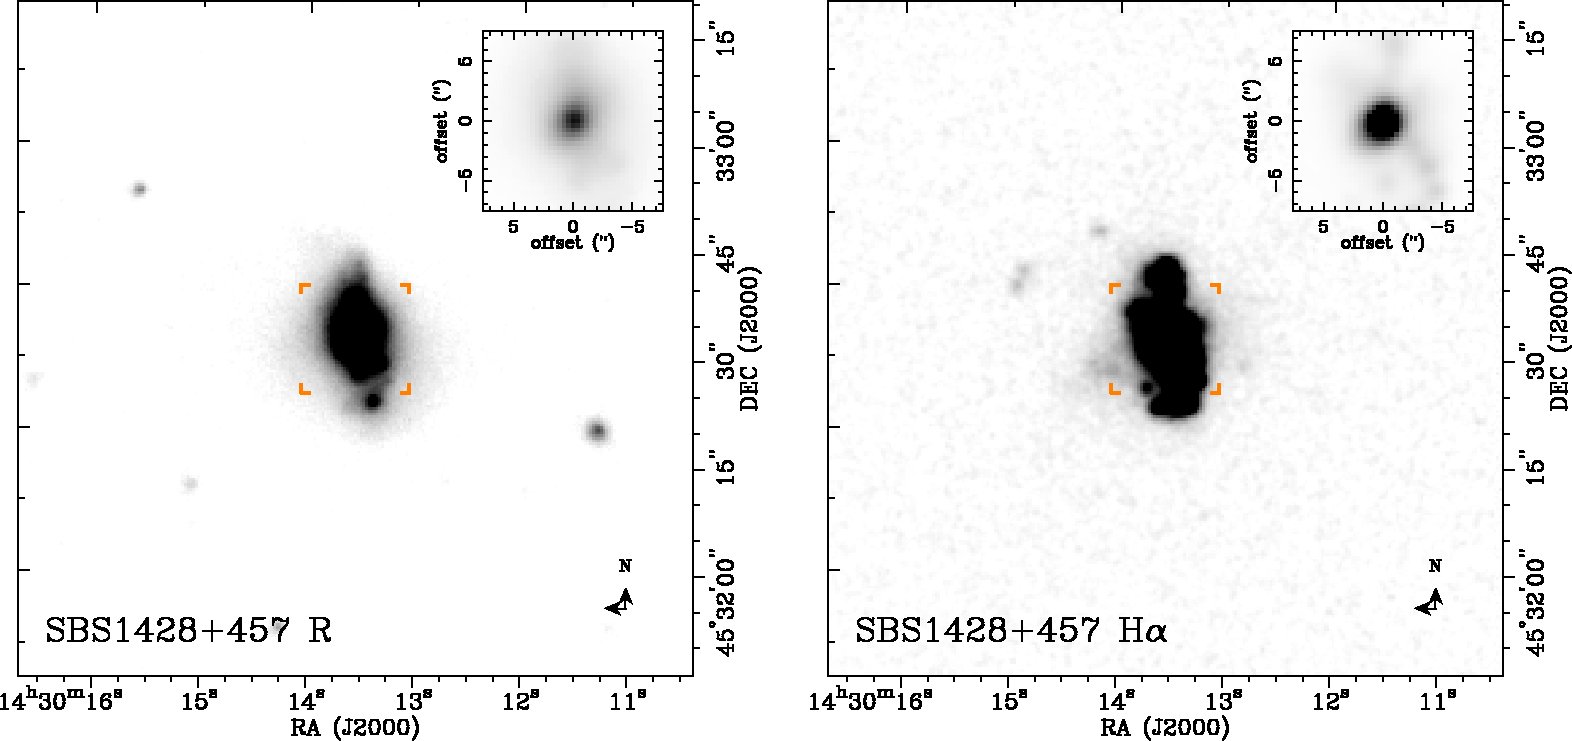
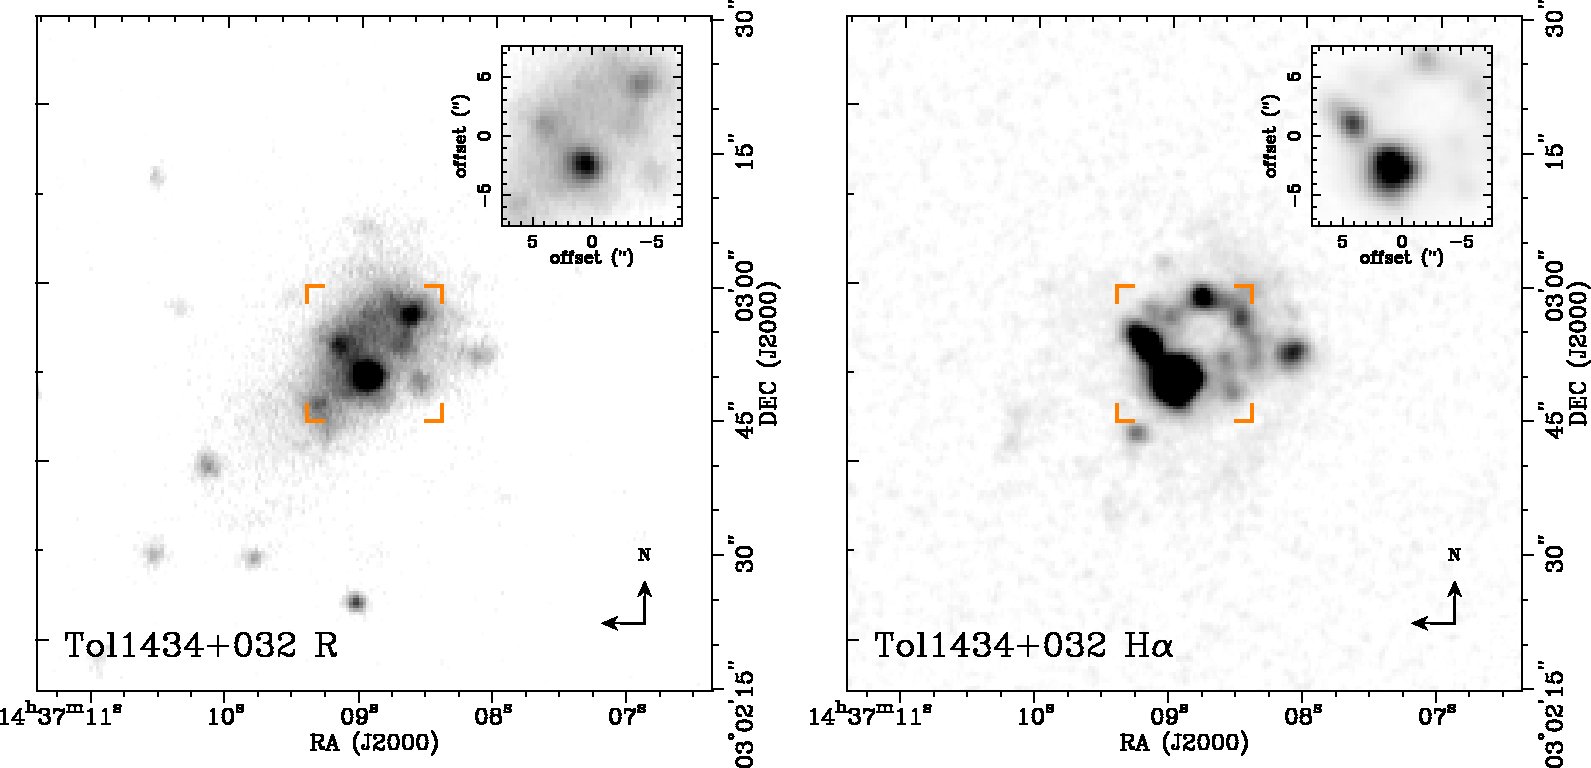
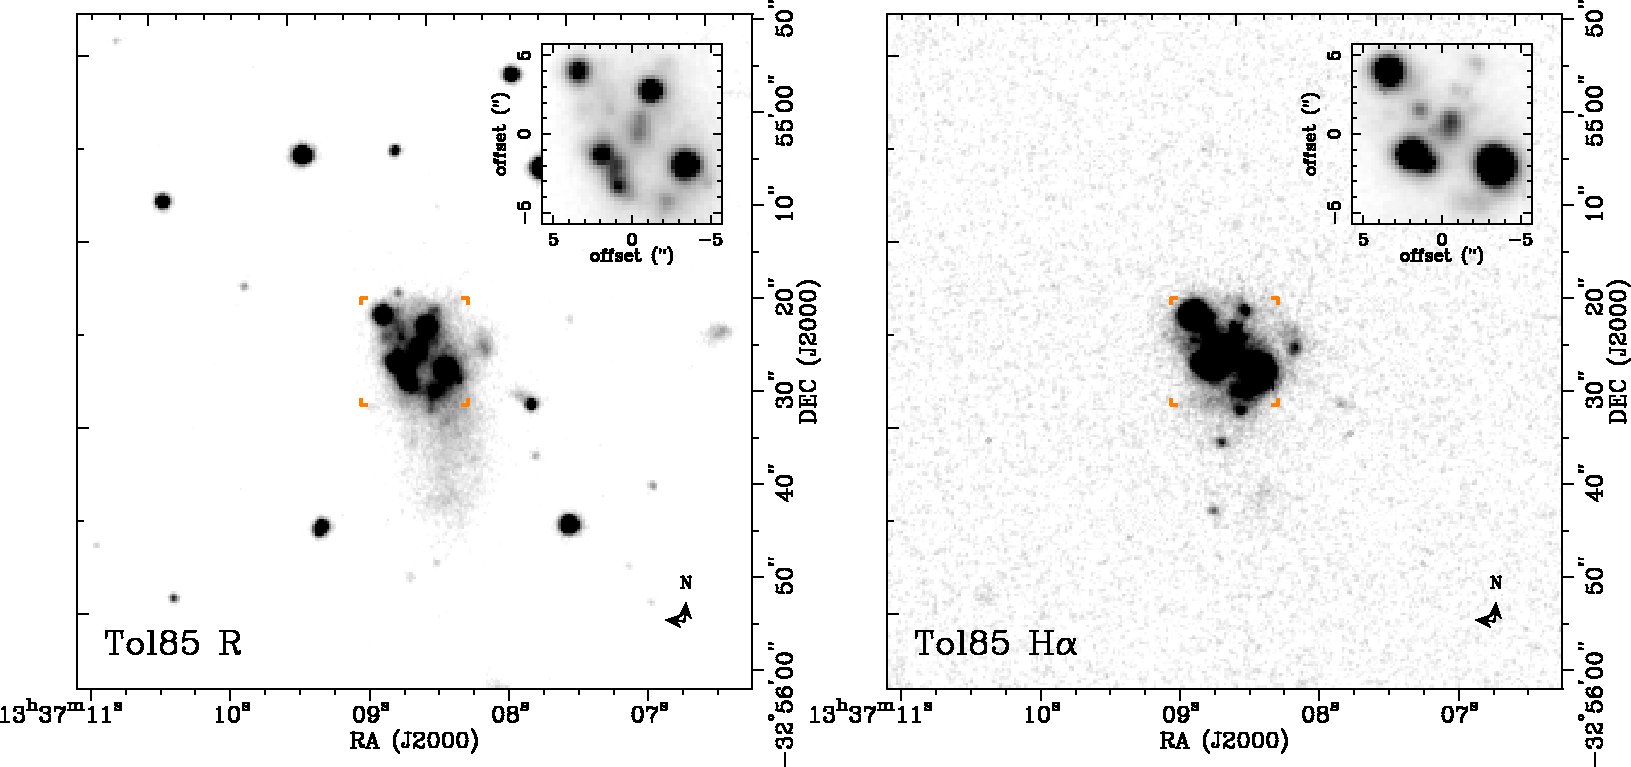
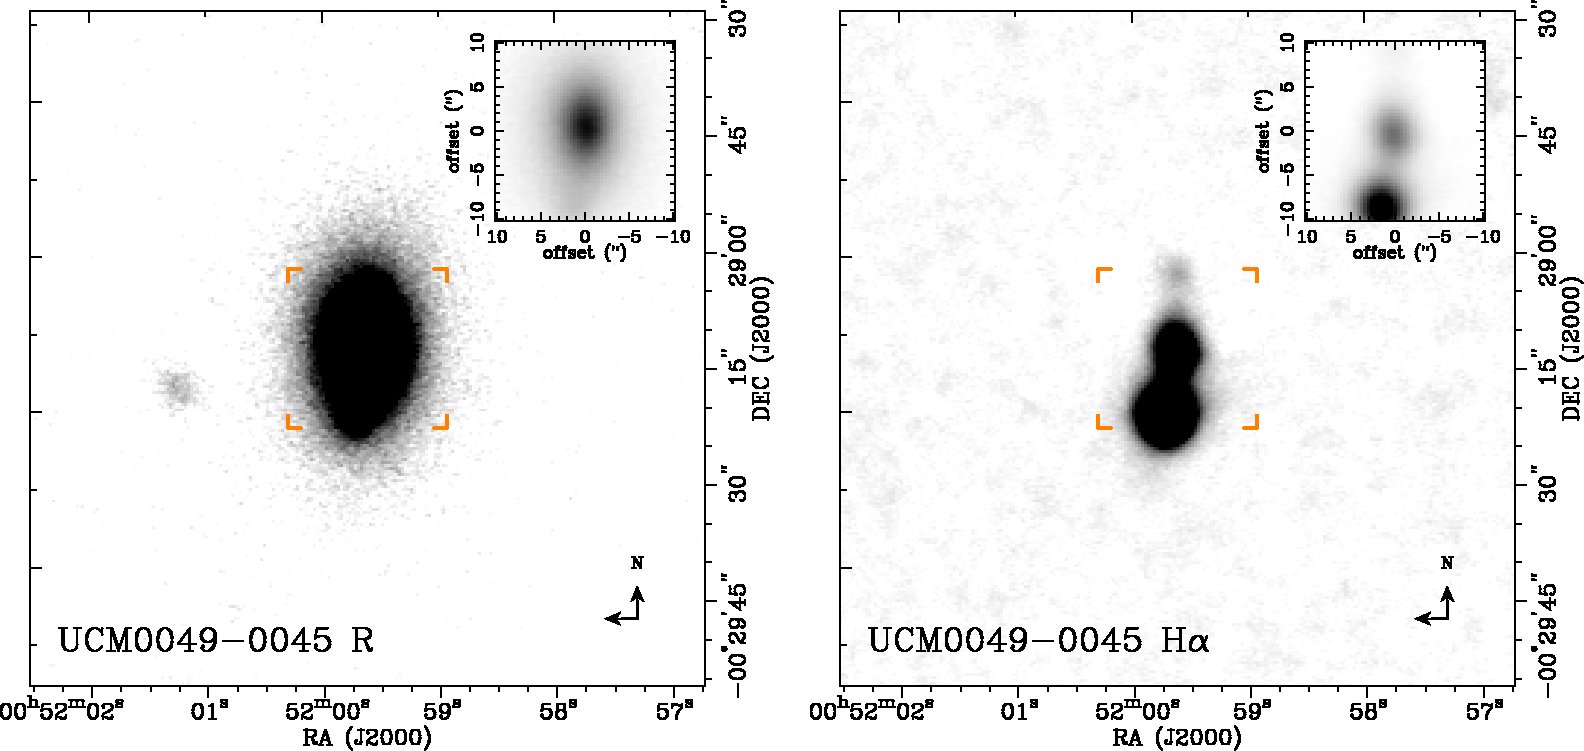
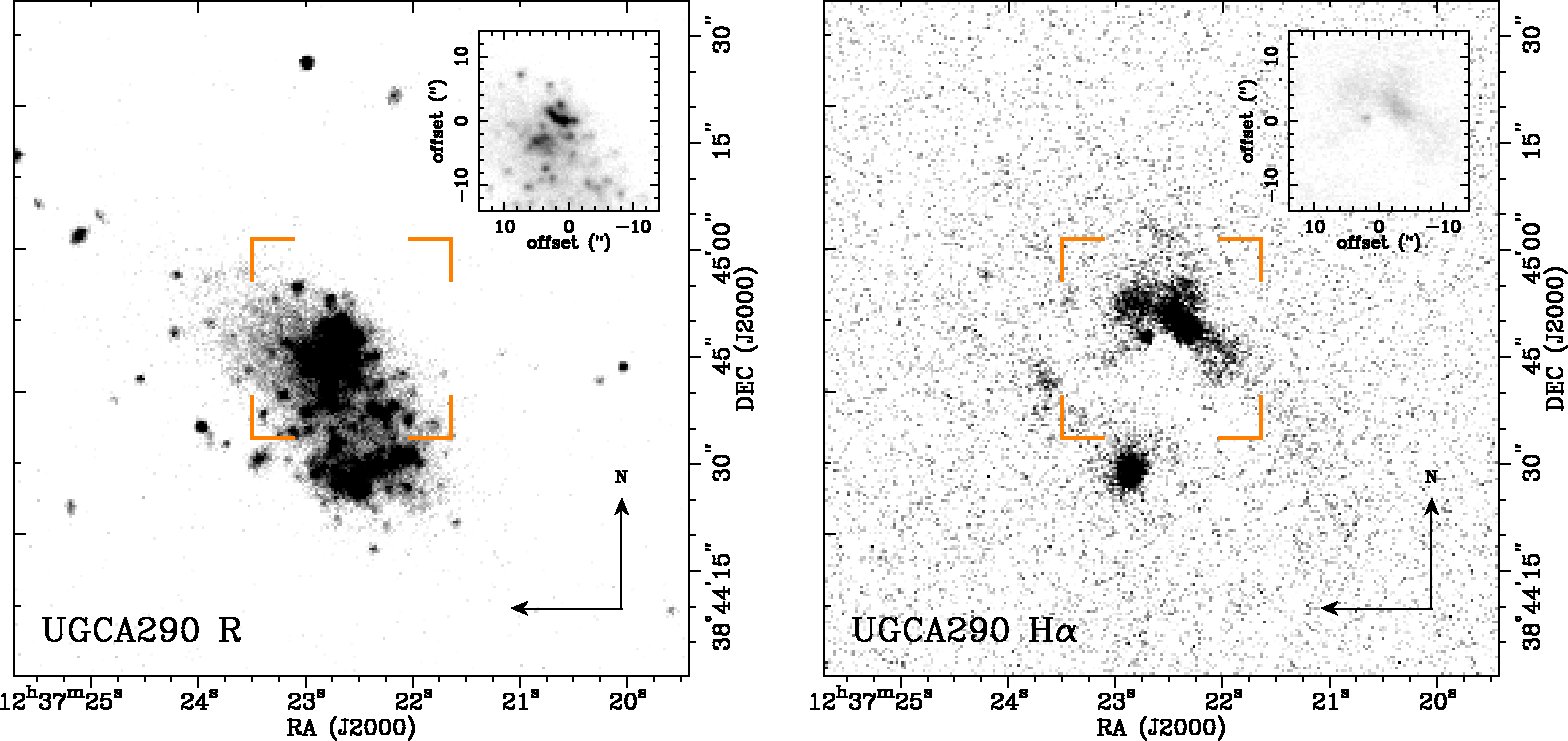
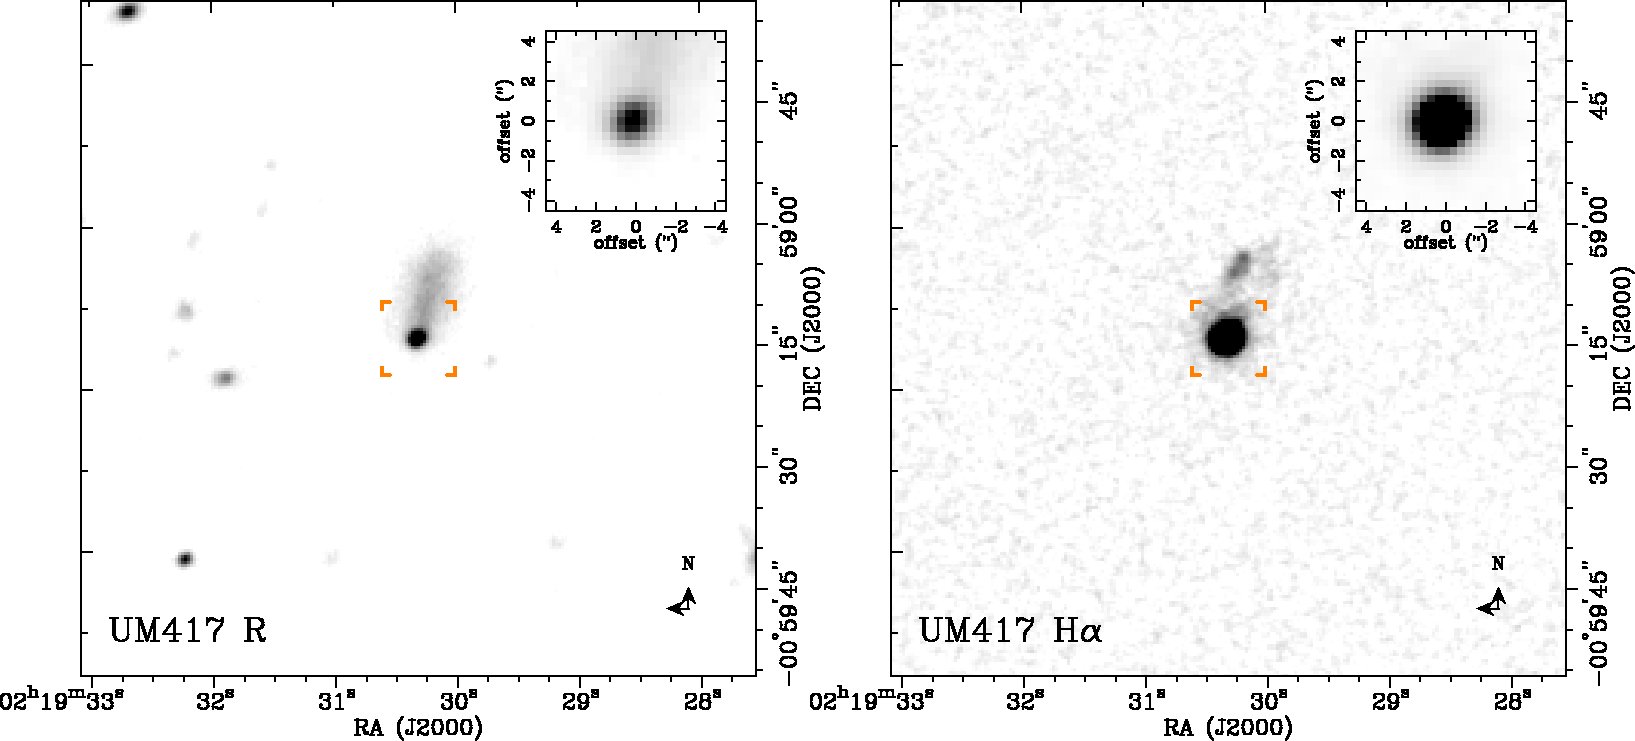
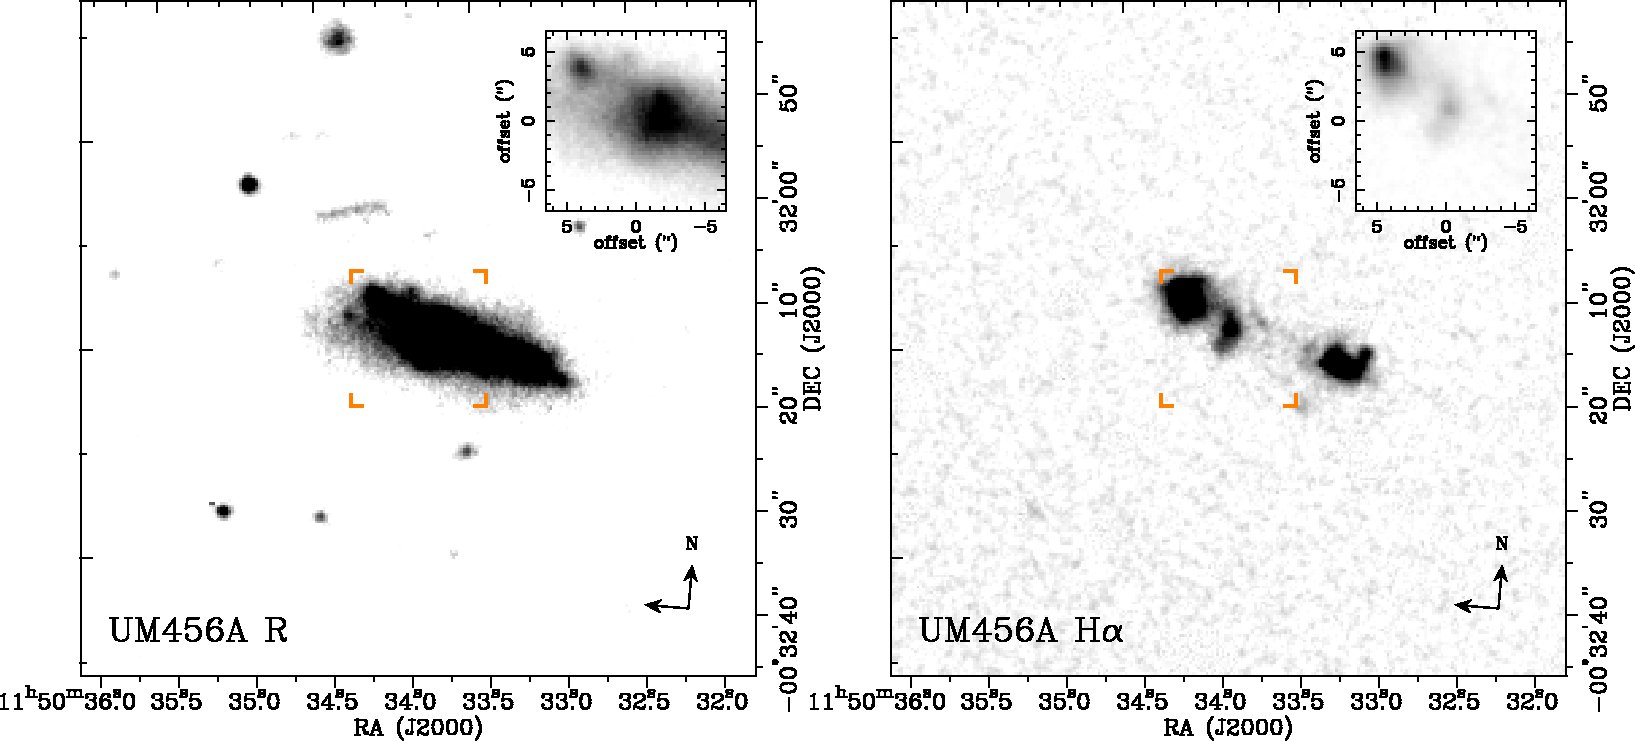
Below we present a collection of high-resolution individual maps used to build the Figure 3 of the paper (see Section 6 for more details).


